


Christmas is in twenty minutes….It feels like that anyway. The hustle and bustle of the season is in full swing, which can be good or bad?!?! This project is good for both a last minute present and also something to refocus your energy and make something with your hands – which for me is rather soothing when I’m stressed. It’s also easier than knitting which I haven’t understood yet (even though I had a teacher and encouragement, I don’t know how to knit!). Anyway, Christmas Yarn Art costs pennies and I think it’s a great way to be creative. I’ve made versions of this before here.
There are so many patterns you can create for the season. Some are easier than others so which one you choose is up to you.
Materials:
Yarn
Medium sized nails
Paint (If you want)
Hammer
Board
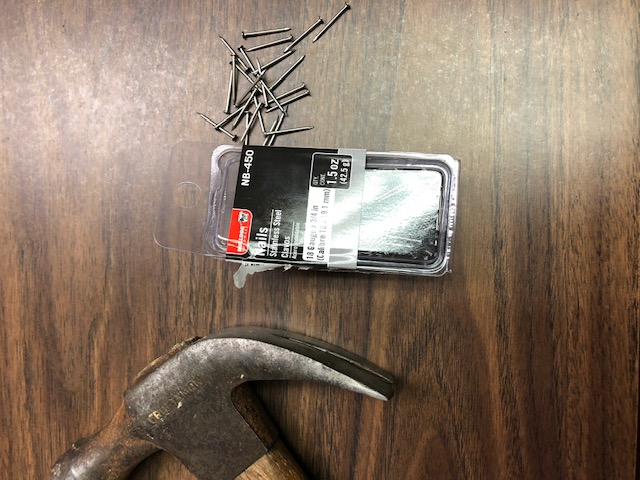
The total cost of this project is under $5 or free if you have the wood and yarn. The nails were 97 cents per box. The photo above is the size of nails you need. If you want the nails to sparkle or shine, get shiny ones. I wanted the nail to be muted.
How-To:
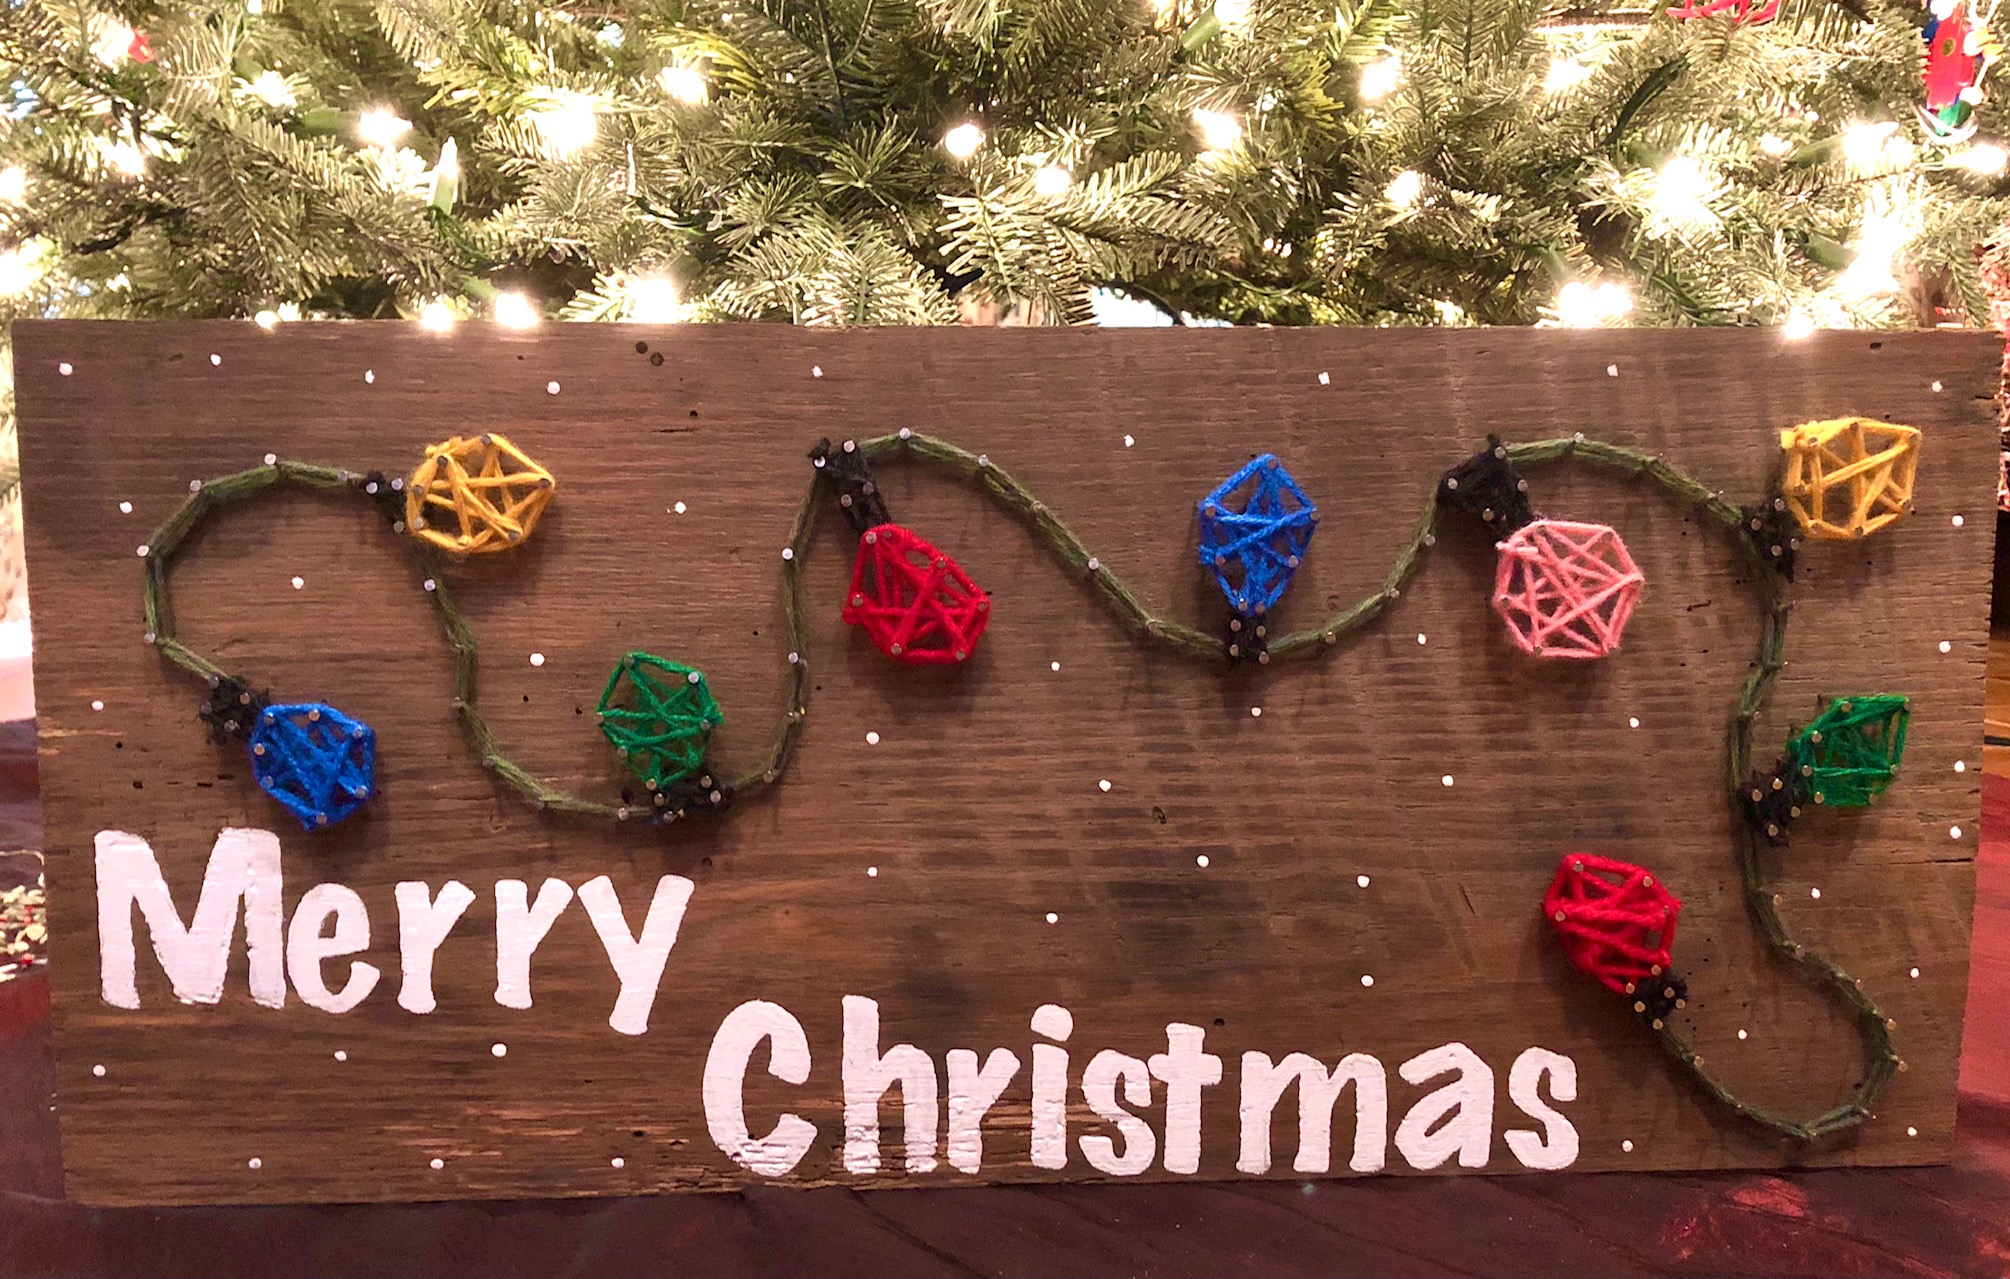
Begin with a piece of wood. You may use barn wood for a rustic look or a painted board in a particular color, it’s up to you. Hammer the nails into the shape/pattern that you’ll be creating. Tap the nails lightly into the wood with a hammer. You want them only to be secure in the wood but not driven in deeply. The biggest tip I can give you is to download a template from online for the shape you want to create. Cut it out and nail around it, this makes the project a cinch. I forgot to photograph this step.

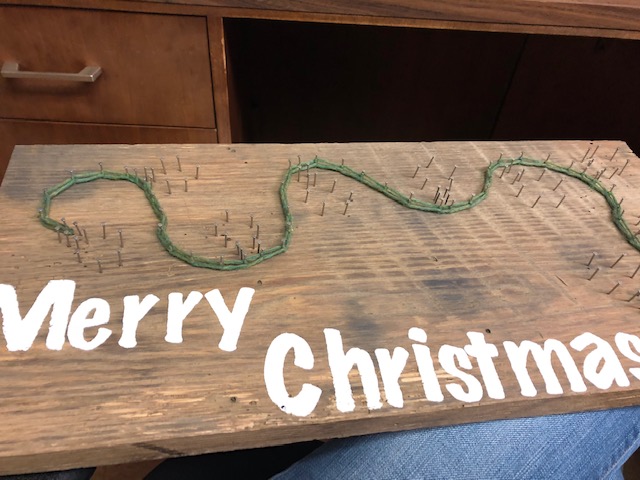
Once your shape/pattern is created, use one strand of yard to go around the pattern and make sure it’s the shape you want. This Christmas lights pattern is more complicated than the tree or star so it takes more time to get the nails exactly in place. I stenciled the words Merry Christmas first and let the paint dry completely on the board so no paint would get in the yard.
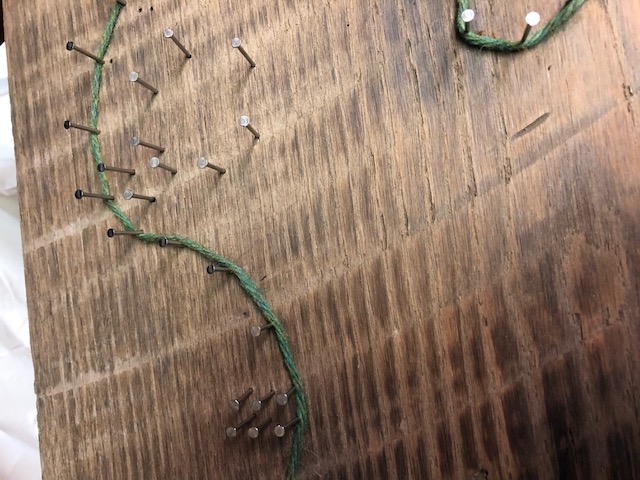
Once my basic shape was created, I added more yarn to complete the light strand.
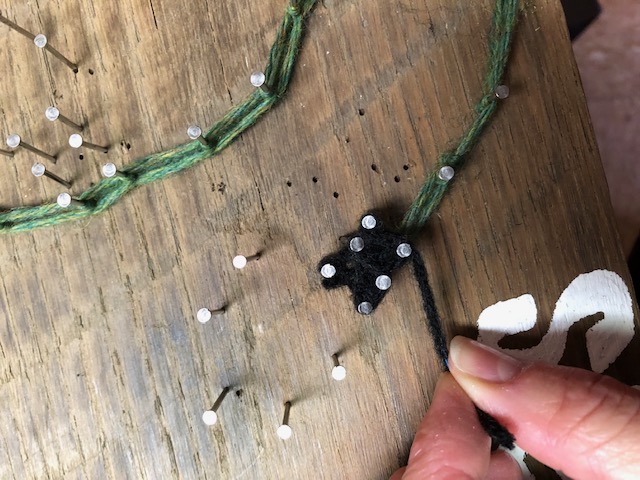
Then I made the light outlets with black yarn.
And then create the lights, wrapping each light in different colors of yarn. As a result, the strand of lights will begin to glow!
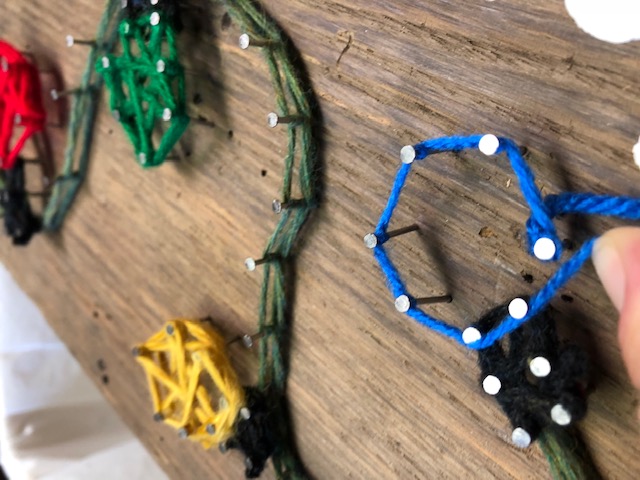
Once I finished with the yarn, I added dots of white paint randomly around the board for a finished look.
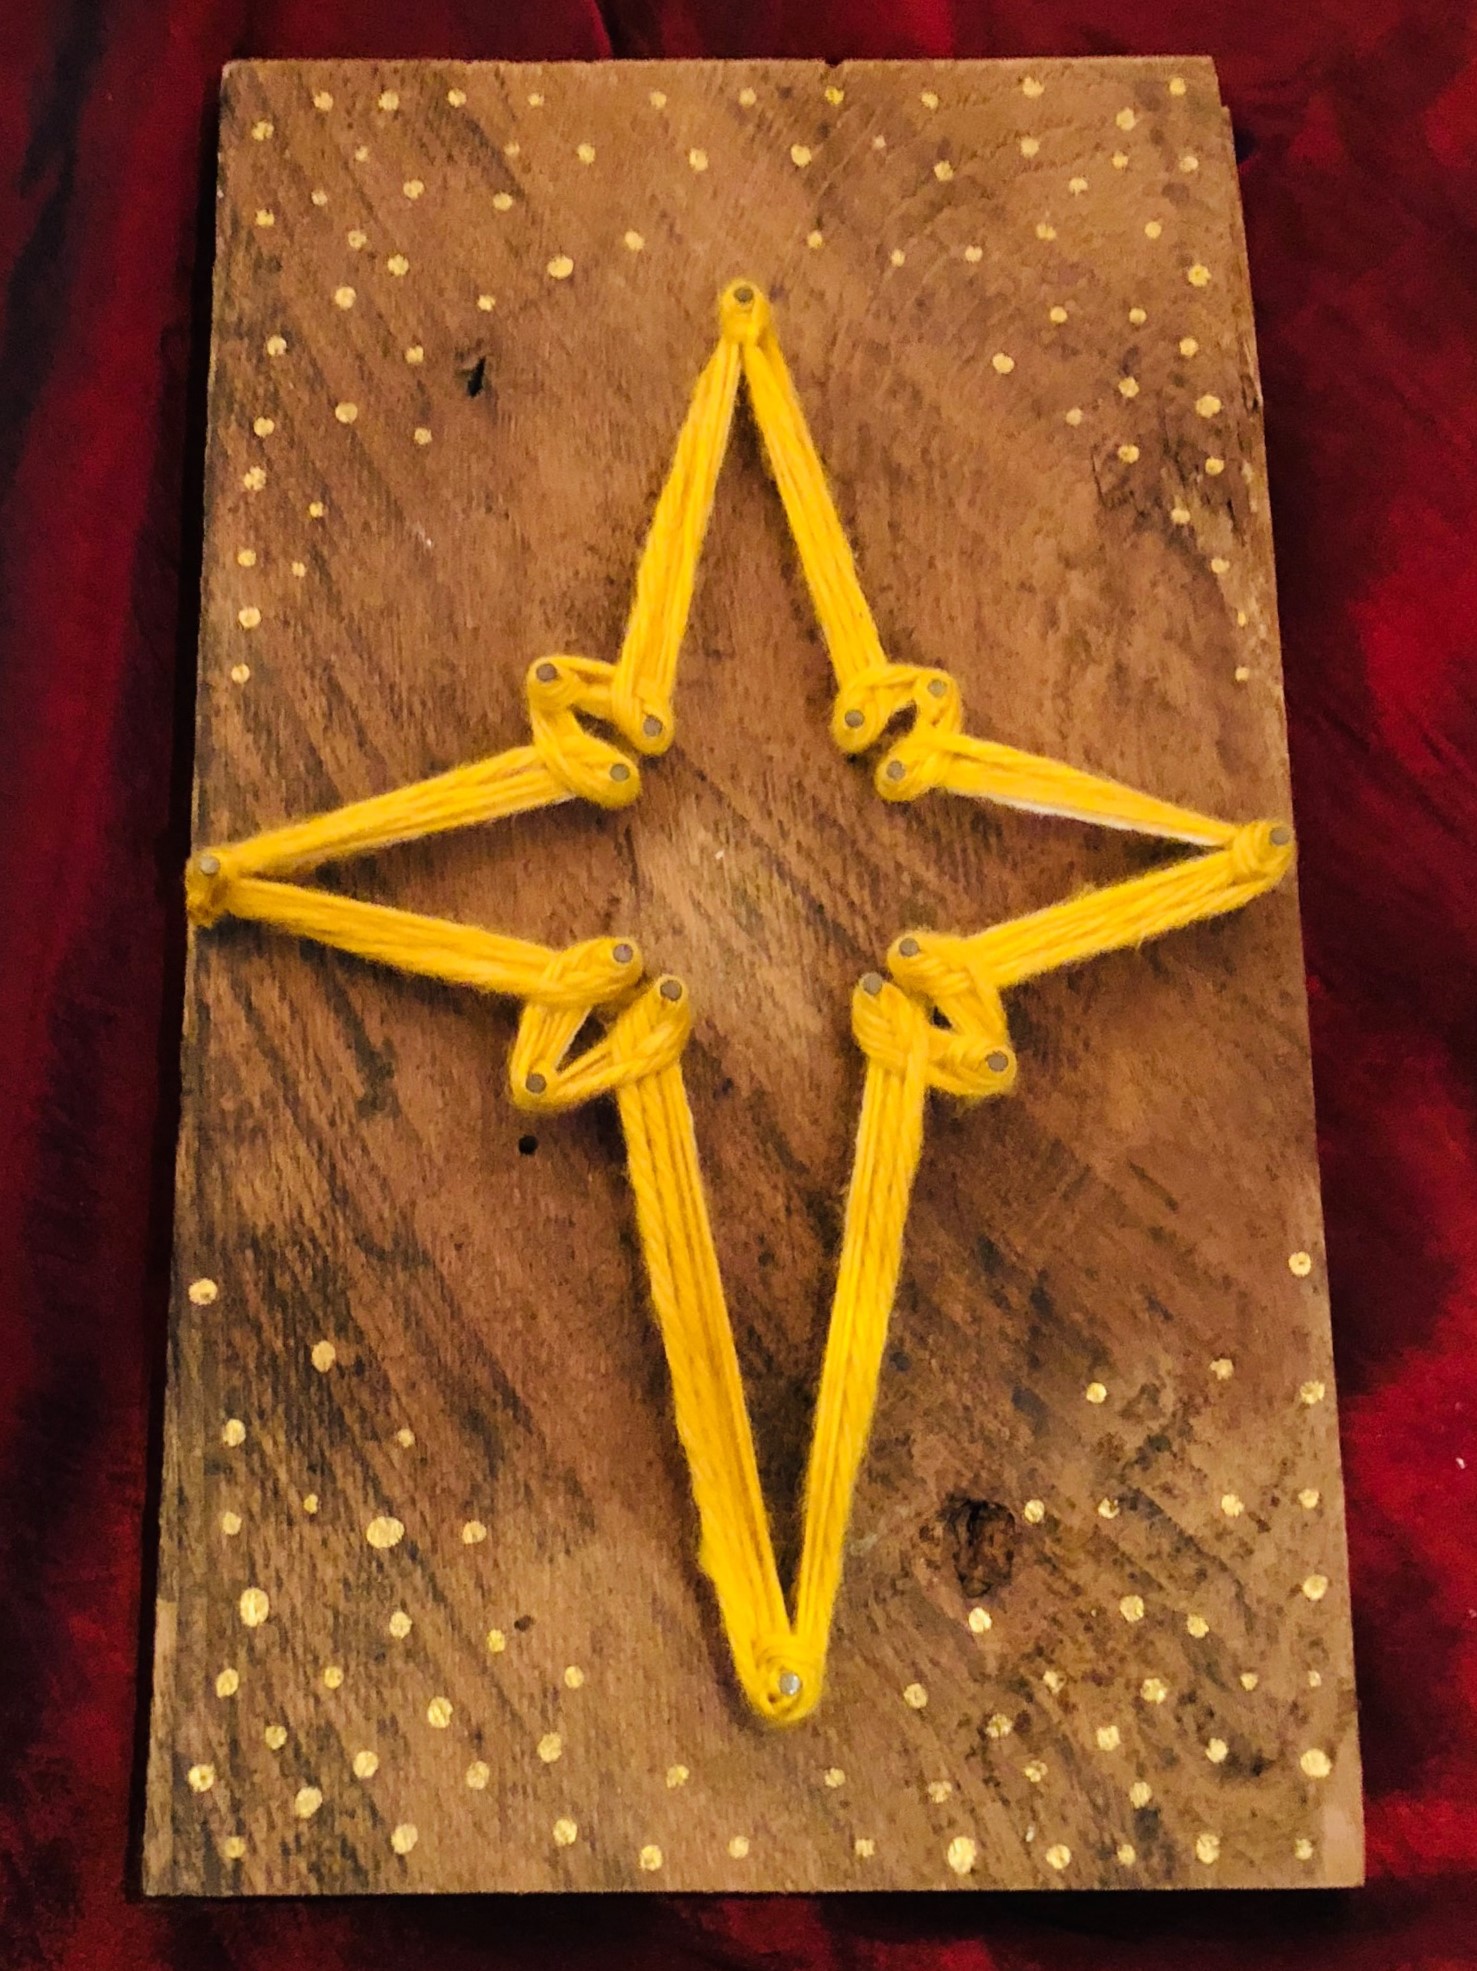
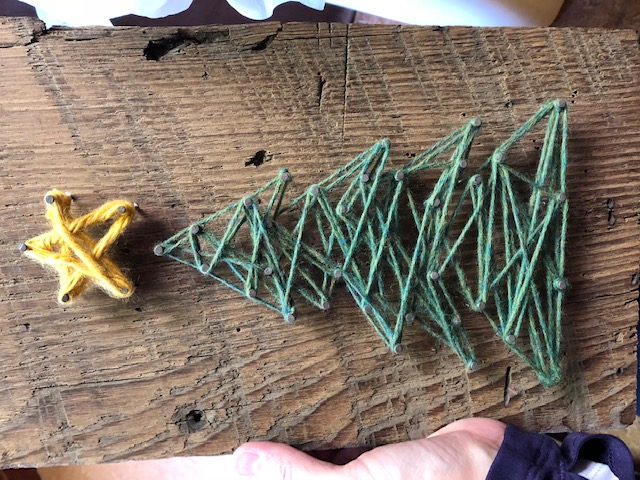
To create the tree, utilize the same technique. I outlined the tree and the star in yarn. Next wrap the yarn randomly around the nails. There isn’t a pattern to follow, I just wrapped back and forth and side to side with the yarn – absolutely no rules. You may also use several different colors of yarn on each heart to layer the colors also. I finished my dotting the nails with red paint for ornaments.
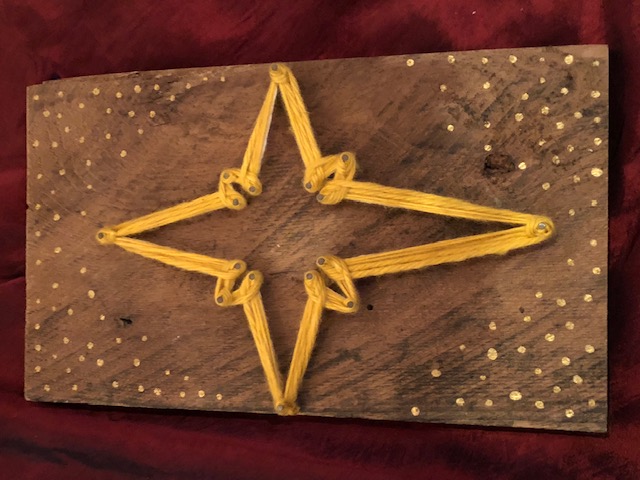
The star uses the same method. I experimented with wrapping the yarn in different directions around the nails and the effect was interesting. I finished with dots of gold paint for effect. Christmas yarn art is a great gift for the holiday season!
#yarnart #merrychristmas #diy #diyprojects #crafts #christmasyarnart