


I have to be organized. Call me OCD or a neat freak, but I need order in my life and especially around my desk. Even though I love my phone, nothing replaces a calendar that I can glance at or a post-it stuck up on the bulletin board about something important I shouldn’t forget. Bulletin boards can be made for pennies and just like the dry erase board you may use items already in your home for a greater cost savings. Today we’ll show you for different styles of boards to craft. These are so simple kids can make them and tailor them to specific tastes and decor.
 |
| DIY Bulletin Boards |
The four options are shown in the photo below. The base of each is made from inexpensive photo frames or disposable plates – how easy is that?
 |
| The options |
You’ll need plastic plates (I used one I had at home and purchased a plastic serving tray for 99 cents at a discount store), inexpensive photo frames (buy the $1 ones at the dollar store), an 8 x 11 piece of fabric or felt, cork board sheets, glue, and patterned duct tape.
 |
| Materials |
The first board is easy. I chose to cover the cork in patterned felt. This one costs about $2.50.
 |
| Fabric Covered Cork |
Cut the cork sheet to fit snugly into the photo frame. This frame is an expensive pop-off cover frame. I threw the glass cover away because it wasn’t needed (and I didn’t want to cut myself). Place the cork down in the frame where the glass used to be.
 |
| Trim the cork |
Glue the fabric onto the cork. I needed to trim mine just a bit but otherwise it was ready to glue. Allow the glue to dry before hanging.
 |
| Glue the fabric onto the cork |
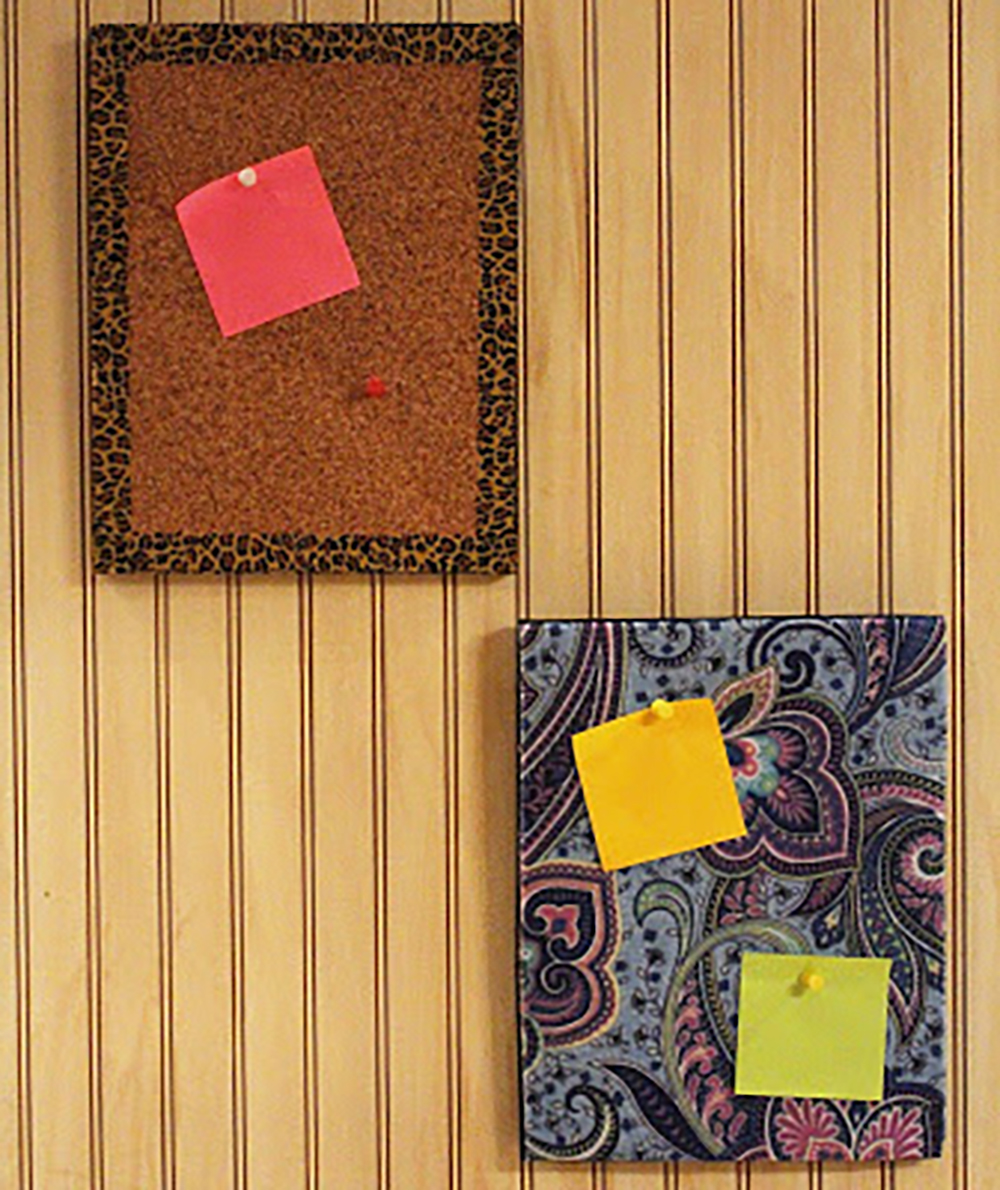
Next I decided to walk on the wild side. Leopard is such a fun print and leopard print tape is really underutilized in my opinion.
 |
| Leopard Print Board |
Again cut the cork to fit inside the photo frame.
 |
| Cut the cork to fit the frame |
Using the tape as a border, line all four edges with the printed tape. Once the inside edges are lined, repeat on the four outside edges of the frame. Roar!
 |
| Line the edges of the frame with printed tape |
The next option uses a disposable plastic serving tray found at most discount stores. It’s easy as pie.
 |
| Pink! |
Cut the cork to fit inside the tray. This tray was a larger size so I only needed to barely trim the edges.
 |
| Trim the cork edges |
Glue the cork to the tray. I used plenty of glue so it will never, ever come off.
| Glue the cork |
My last option is also my most inexpensive option. I used small, round plastic plates. The cork is covered in printed, in this case silver glittered, duct tape. The cost of this board is about 75 cents. It would be really cool to make 3-4 of these and display them together on a wall.
 |
| Glitter Board! |
Cut the cork into a round shape. I could get 2-3 round shapes from one sheet of cork board so it was really inexpensive per bulletin board.
 |
| Cut a round shape |
Glue the round cork shape onto the plate. Again use plenty of glue.
 |
| Glue the round cork |
You’ll be ready to study (and remember) with these Back to School Bulletin Boards!
 |
| #backtoschool |
#backtoschool #school #firstday #bulletinboard #glitter #leopard #leopardprint